
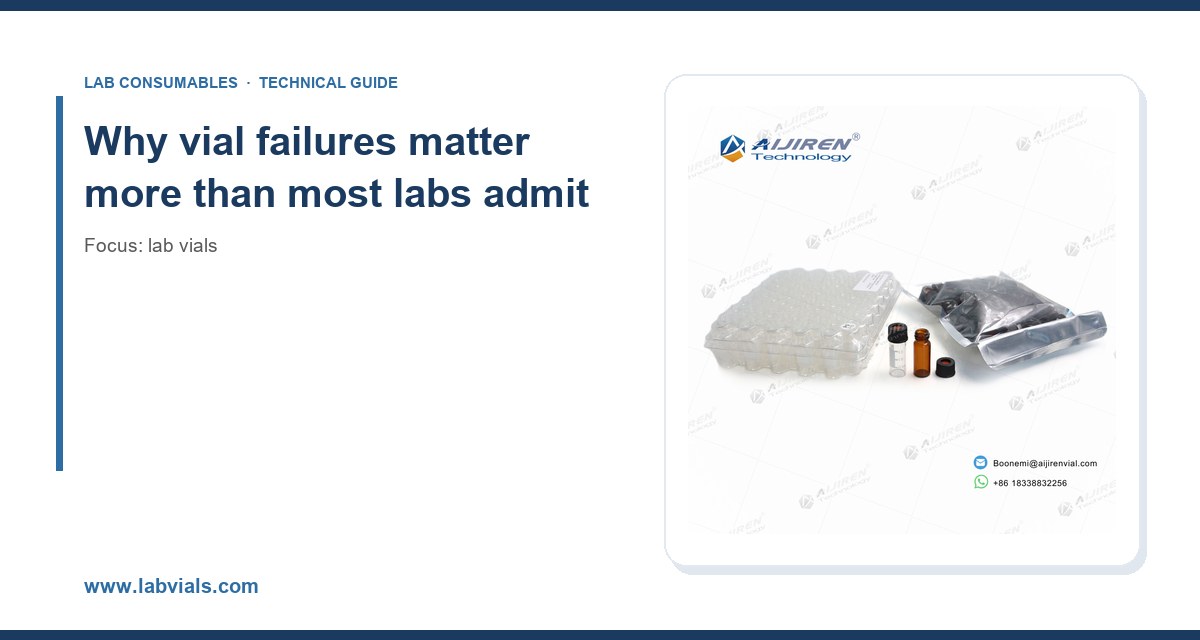
I have spent the better part of two decades watching vials fail. Not in dramatic ways, mostly. A septum coring after the fourth injection. A crimp cap that looked tight until the autosampler needle pushed the whole assembly down. A batch of 2 mL vials that sat in a 4 °C fridge for three weeks and came back with a hairline crack at the shoulder. The chromatography data looked fine until the internal standard area counts dropped 18% and nobody could explain why. In almost every case, the root cause was traceable to a decision made long before the sample reached the instrument: the wrong vial material, the wrong closure, the wrong torque, or the wrong storage condition. This article walks through the failures I see most often, what actually causes them, and the specific parameters that prevent them.
A vial is a container, but in analytical chemistry it is also a sample preparation vessel, a reaction chamber, a thermal environment, and an interface to a needle. Each of those roles has its own failure mode. When a vial fails, the consequences are rarely limited to the vial. You lose the sample, you lose the run, and sometimes you lose the batch of results because the failure introduced contamination or evaporation that skewed everything downstream.
The economics are lopsided. A 2 mL clear glass vial costs somewhere between a few cents and a dollar depending on glass grade and certification. A single failed sequence on an HPLC, including instrument time, labor, and re-preparation, can run into the thousands. I have seen labs try to save $0.15 per vial by switching to an uncertified generic, then spend two weeks chasing a phantom contaminant peak at 4.2 minutes. That peak turned out to be a plasticizer leaching from a low-grade cap liner.
So the point of this article is not to sell you the most expensive vial on the market. It is to show you which specifications actually drive failure, and where the numbers need to land for your application. If you are sourcing vials broadly, the catalog at Lab Vials is a reasonable starting reference for the standard dimensions and glass grades, but the decisions below are what determine whether a vial survives your workflow.
The failure modes I see most often, ranked by frequency
1. Septum coring and needle damage
This is the number one failure in autosampler workflows. The needle punches through the septum, and instead of resealing cleanly, it slices out a small plug of silicone or rubber. That plug falls into the sample. If you are lucky, it sinks and you see it. If you are unlucky, it floats, gets aspirated, and blocks the needle or the injection port liner.
Coring has three root causes. The first is septum thickness and durometer. A standard silicone/PTFE septum at 1.0 mm thickness with a PTFE face on the sample side will tolerate roughly 50 to 100 punctures before the silicone layer degrades, depending on needle gauge. A 0.9 mm needle (common on Agilent and Waters autosamplers) cores faster than a 0.5 mm needle because the larger cross-section displaces more material. The second cause is a dull or burred needle. I have watched labs replace entire vial lots before someone checked the needle with a loupe and found a hook on the tip. The third cause is misalignment between the needle path and the septum center, which happens when the vial is not seated fully in the tray.
Prevention is straightforward. Use a septum with a PTFE film on the sample side (it resists coring and chemical attack), verify needle condition every 500 injections, and confirm the autosampler tray height is calibrated. If you run high-throughput sequences, pre-slit septa are worth considering, but they trade puncture resistance for a small evaporation risk. The closure specialists at Septa publish durometer and puncture data that is more useful than most datasheets, and it is worth reading before you standardize on a cap.
2. Evaporation and concentration drift
Evaporation is insidious because it does not announce itself. The sample volume drops, the analyte concentration rises, and your calibration curve quietly goes out of tolerance. In a 2 mL vial filled to 1.5 mL, the headspace is small enough that a well-seated septum holds concentration drift under 1% over 24 hours at 4 °C. Fill the same vial to 0.5 mL and the headspace volume triples; drift can reach 5 to 10% in the same window, especially for volatile analytes like methanol or dichloromethane.
The root cause is almost always headspace ratio, not the septum itself. Septa are permeable to some degree, and no elastomer is a perfect barrier. A crimp cap seated with the correct tool creates a better seal than a screw cap, but a screw cap with a properly torqued closure and a PTFE-lined septum is adequate for most 24 to 48 hour holds. The failure happens when labs leave samples in the autosampler overnight at ambient temperature with a loose cap. If your method requires a long hold, use a crimp-top vial or a screw cap with a bonded septum and store at 4 °C, not room temperature.
3. Crimp cap failures: loose, over-crimped, and everything between
Crimp closures fail in two opposite directions. Under-crimping leaves the seal incomplete, and the vial leaks or evaporates. Over-crimping fractures the glass neck or deforms the cap skirt so the autosampler gripper cannot lift it. Both are common, and both are preventable with a torque specification.
The correct crimp for a standard 11 mm aluminum crimp cap on a 2 mL vial seats the cap so the septa is compressed evenly and the skirt folds under the neck bead without crushing the glass. Hand crimpers vary widely. I specify a crimping force of roughly 40 to 60 N on a bench crimper, verified by checking that the cap cannot be rotated by hand and that the vial does not leak when inverted. For 20 mm caps on larger vials, the force is higher, and the glass neck is thicker, so the margin for error is wider. If you are crimping hundreds of vials a day, a pneumatic crimper with a set stop is not a luxury. It is the difference between a 2% and a 15% leak rate.
4. Glass breakage at the shoulder and base
Glass vials break in predictable places. The shoulder is the thinnest wall section on a molded vial, and it is where thermal stress concentrates. The base is where impact from dropping or from autosampler grippers shows up. I have seen entire lots fail because the glass was Type III soda-lime instead of Type I borosilicate, and the lab was autoclaving or freeze-thawing. Soda-lime has a higher coefficient of thermal expansion, so it cracks under the same thermal cycling that borosilicate survives.
The rule I use: if the vial will see temperatures below -20 °C or above 80 °C, or if it will be autoclaved, specify Type I borosilicate (USP Type I, ISO 3585). For ambient HPLC work with aqueous or organic mobile phases, Type I is still the safer default because it leaches fewer ions. If you are doing trace metals analysis at the ppb level, low-alkali glass or even PTFE or PFA vials may be required. The Aijiren brand line covers both glass grades and the polymer options, and the grade is usually printed on the case, which saves a lot of guessing.
5. Adsorption of analytes onto glass
This one catches people in bioanalysis and environmental work. Certain compounds, especially amines, peptides, and some pesticides, adsorb onto the silanol groups on glass surfaces. The result is a loss of signal that looks like a recovery problem but is actually a surface chemistry problem. The fix is either to silanize the glass (a deactivating treatment) or to use a polymer vial. For LC-MS work with basic analytes, a deactivated glass vial or a polypropylene vial is often the better choice. For volatile organics, the VOA vial format with a PTFE-lined septum is the standard because it minimizes both adsorption and headspace loss.
Material selection: the decision that prevents most failures
Most of the failures above trace back to a material or format decision. Here is the comparison I hand to labs when they are standardizing a consumable.
| Vial type | Typical size | Temp range | Best for | Main failure risk |
|---|---|---|---|---|
| Type I borosilicate glass, screw top | 2 mL, 12 x 32 mm | -80 to 120 °C | HPLC, LC-MS, general | Septum coring; cap torque |
| Type I borosilicate glass, crimp top | 2 mL, 11 mm | -80 to 120 °C | GC, long holds, volatile | Over/under-crimp |
| Type III soda-lime glass | 2 mL to 20 mL | -20 to 80 °C | Ambient, non-critical | Thermal cracking; ion leaching |
| Polypropylene | 1.5 to 50 mL | -80 to 120 °C | Basic analytes, metals | Adsorption of hydrophobic compounds |
| PTFE / PFA | 1 to 30 mL | -200 to 260 °C | Trace metals, aggressive solvents | Cost; mechanical softness |
| Amber glass | 2 mL, 12 x 32 mm | -80 to 120 °C | Light-sensitive analytes | Same as clear glass; check certification |
Two numbers in that table deserve emphasis. The -80 to 120 °C range for borosilicate is conservative; the glass itself handles more, but the septum and cap become the limiting factor above 120 °C. And the 12 x 32 mm dimension is the de facto standard for autosamplers from Agilent, Waters, Shimadzu, and Thermo. If your vial deviates from that by more than 0.2 mm in diameter or height, you will get gripper errors. I have seen a “compatible” vial that was 0.4 mm too tall jam an entire tray.
Closure selection: septa, caps, and the numbers that matter
The septum is where most chemistry happens, and it is the most under-specified component in the workflow. Here is what I check.
- Face material: PTFE on the sample side for chemical resistance; silicone on the needle side for resealability. A pure silicone septum will swell in dichloromethane and fail within hours.
- Thickness: 1.0 mm for standard autosamplers; 1.5 mm for high-puncture-count or high-temperature work. Thicker septa resist coring but increase needle penetration force.
- Durometer: 45 to 55 Shore A for silicone is the sweet spot. Softer septa reseal better but core more easily; harder septa resist coring but leak after fewer punctures.
- Puncture count: Replace septa after 50 to 100 punctures for standard silicone/PTFE. For pre-slit septa, cut that to 25 to 50.
- Certification: For LC-MS, specify low-extractable or MS-certified septa. The difference in background noise at low mass ranges is measurable.
Caps matter too. Aluminum crimp caps with a center hole of 5.5 to 6.0 mm are standard for 11 mm crimp vials. Screw caps use a 9 mm or 13 mm thread depending on the vial, and the thread standard is not universal across manufacturers. A 9 mm cap from one supplier may not seal on a 9 mm vial from another. This is where buying vial and cap as a matched set pays off. The Lab Vials catalog lists matched vial-cap-septa combinations, and I recommend standardizing on one supplier’s system rather than mixing components.
Operational precautions that prevent the top five failures
Sample preparation
Fill vials to no less than 50% of nominal volume if the sample will sit for more than a few hours. For a 2 mL vial, that means at least 1.0 mL. If your method requires a smaller volume, use a 300 µL insert inside the vial so the headspace above the liquid is minimized. Inserts add cost and a step, but they cut evaporation drift dramatically.
Never fill above the shoulder. Overfilled vials leak when the cap is crimped or screwed down because the liquid is displaced into the seal. I have seen this cause a 10% loss in a batch of 96 vials, all because someone filled to 1.9 mL in a 2 mL vial.
Storage and transport
Store filled vials upright. I know it sounds obvious, but I have seen trays of vials laid on their side in a fridge, and the septa were wet with sample when they came out. That is a contamination risk and a coring risk in one.
For frozen storage below -20 °C, leave at least 20% headspace to allow for ice expansion. A 2 mL vial filled to 1.8 mL and frozen will crack at the shoulder. Fill to 1.5 mL maximum for freeze storage, and use a crimp cap rather than a screw cap because the crimp maintains seal integrity through thermal cycling better.
Autosampler handling
Verify tray alignment and gripper height every time you change vial lots. A 0.5 mm height difference is enough to cause a gripper miss. Run a test tray with water before committing a real sequence. And check needle condition on a schedule: every 500 injections for standard needles, more often for high-viscosity samples.
Troubleshooting checklist
When a vial-related problem shows up in the data, work through this list in order. It is ordered by likelihood, not by severity.
- Check the septum first. Look for a plug missing from the center. If the septum is cored, replace the lot and check the needle.
- Weigh a filled vial before and after the run. A loss of more than 2 mg over 24 hours indicates a seal failure. Check cap torque and septum seating.
- Inspect the cap skirt. A cracked or deformed skirt means over-crimping or a mismatched cap-vial pair. Verify the crimp force and the thread standard.
- Look for glass cracks at the shoulder. If present, check storage temperature and fill volume against the freeze-expansion rule.
- Run a blank vial from the same lot. If the blank shows the contaminant peak, the problem is the vial or septum, not the sample. Compare against a certified low-extractable lot.
- Check analyte recovery against a fresh standard in a different vial type. If recovery improves in a polymer or deactivated vial, you have an adsorption problem, not a preparation problem.
- Verify vial dimensions with calipers. Diameter and height should be within 0.2 mm of the 12 x 32 mm standard for autosampler compatibility.
- Review the certificate of analysis. Glass grade, septum durometer, and extractables data should be on file. If the supplier cannot provide them, that is the root cause.
What I recommend standardizing on
For a general analytical lab running HPLC, LC-MS, and GC, here is the specification I would put in a purchasing document today.
- Vial: 2 mL, 12 x 32 mm, Type I borosilicate glass, clear or amber as needed, with a graduated write-on spot. Certified for LC-MS if you run low-mass work.
- Closure: 9 mm screw cap with a 1.0 mm silicone/PTFE septum, or 11 mm aluminum crimp cap for volatile work and long holds. Matched to the vial from the same supplier.
- Septa: 45 to 55 Shore A, PTFE-faced, replaced every 50 to 100 punctures. Pre-slit only for high-throughput sequences with short hold times.
- Crimp force: 40 to 60 N on a calibrated bench crimper for 11 mm caps; pneumatic crimper with set stop for production volumes.
- Fill volume: at least 50% of nominal for holds over a few hours; at least 20% headspace for frozen storage; never above the shoulder.
- Storage: upright, 4 °C for short holds, -20 °C or below with headspace allowance for long-term. Amber glass for light-sensitive analytes.
If you need to cross-check the chemistry against your method, the reference material at Agilent chromatography consumables and columns, Thermo Fisher chromatography and sample handling, and Restek technical resources for chromatography is useful for matching vial and septum choices to specific detector and column requirements. For environmental work, the U.S. EPA SW-846 test methods specify vial and preservation requirements that override any general recommendation here.
Takeaway
Vial failures are almost always specification failures, not manufacturing defects. The septum durometer, the glass grade, the crimp force, the fill volume, and the headspace ratio are the five variables that determine whether a vial survives your workflow. Get those numbers right, verify them with a certificate of analysis and a periodic needle and crimper check, and the failure rate drops to near zero. Get them wrong, and you will spend your time chasing contaminant peaks and lost samples instead of running analyses.
References & further reading
Related resources from our lab consumables network:
- Lab Vials at labvials.com
- Aijiren Brand at aijirenvials.com
- Voa Vial at voavial.com
- Septa at septacaps.com
External references and standards: