
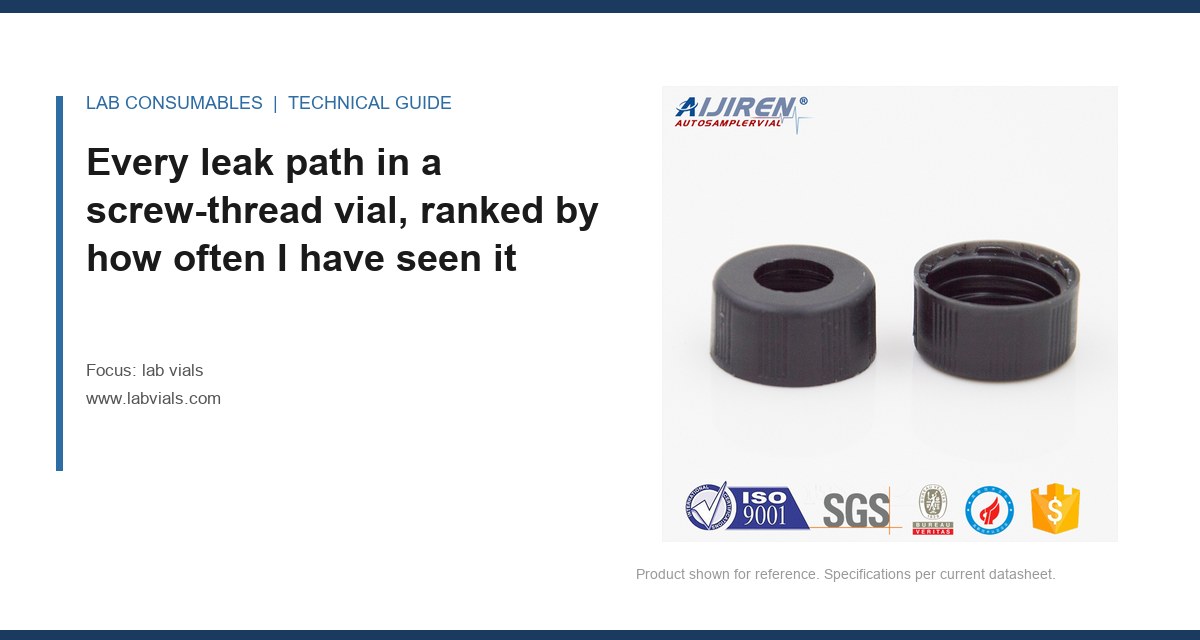
A 96-well plate evaporation study I reviewed last spring lost 11.4% of its methanol content in 6 hours at 8 °C, and the analyst blamed the autosampler. The vials were fine. The caps were not. The septa had been punctured 14 times each on a 30 mm tear-off cap, and nobody had replaced them since the run started. That is the most common shape of lab vials seal failure, evaporation and sample loss: the vial is innocent, the closure is guilty, and the loss is invisible until someone weighs something.
This article is about the leakage paths you can actually measure, how a septum behaves after the first puncture, why compression set turns a good cap into a bad one, and how to run a gravimetric loss test that tells you the truth in 24 hours instead of a failed sequence in three weeks. If you are chasing a ghost peak from a cored septum, that is a different problem and someone else has written it up. Here we stay on mass transfer.
Every leak path in a screw-thread vial, ranked by how often I have seen it cause a problem
There are five places a sample can escape a closed vial. I have ranked them by the number of investigations I have personally run, not by theory.
- 1. Septum-to-needle interface (post-puncture): the single largest source of slow loss in autosampler trays. A 23-gauge needle leaves a hole roughly 0.64 mm in diameter. A silicone septum with 50 Shore A hardness and 1.5 mm thickness will close that hole to under 0.05 mm within about 2 seconds, but it will not close it to zero. The residual channel is the leak.
- 2. Cap-to-neck thread engagement: the seal is not the thread. The seal is the septa compressed against the neck land. If the cap bottoms out on the thread before the septa compresses, you have a loose cap that looks tight.
- 3. Septum-to-cap crimp or snap: on crimp caps, an uneven crimp (one side at 4.5 mm, the other at 5.2 mm across the skirt) leaves a crescent gap. On snap caps, a partially seated cap looks closed but is not.
- 4. Neck land damage: a chipped or out-of-round neck (ovality over 0.15 mm) will not seal against any septa, no matter the torque.
- 5. Glass body porosity or micro-cracks: rare, but real. Usually traceable to a specific lot and a specific forming station.
If you are buying lab vials on price alone, path 2 and path 4 are where the money gets lost. A vial that costs 4 cents less but has a 0.2 mm ovality problem will cost you a re-run.
One more thing about the ranking. The order changes with temperature. At 8 °C, path 1 dominates because the elastomer is stiff and slow to close a puncture. At 40 °C, path 2 and path 3 move up, because the elastomer softens, takes compression set faster, and the cap that was tight at t=0 is measurably looser by hour 12. I have seen a closure that passed a 1-hour leak check at 40 °C fail a 12-hour check on the same lot. The mechanism did not change. The clock did.
How the leak paths interact
These paths are not independent. A cap torqued to 0.8 N·m (below the 1.0 N·m floor) compresses the septa less, which means the puncture channel closes more slowly, which means path 1 gets worse even though the root cause is path 2. This is why a torque audit has to happen before a septa change. If you swap to a thicker septa without fixing the torque tool, you have added cost without fixing the mechanism. I have watched labs do exactly that, twice, on the same method.
What a septum actually does after the first puncture, and why the 10th puncture matters more than the 1st
People assume a septum either seals or it does not. The reality is that a septum has a puncture history, and its sealing performance degrades non-linearly.
The first puncture is not the problem
A fresh silicone/PTFE septum on a 9 mm screw cap, compressed to about 30% of its thickness, will re-seal a 23-gauge puncture to a helium leak rate under 1 × 10⁻⁶ mbar·L/s within seconds. That is good enough for almost any GC or HPLC application. The PTFE facing, which is what actually contacts the sample, does not re-seal at all: it is a barrier film, not an elastomer. It gets pushed aside and stays aside. The silicone underneath does the re-sealing work. This is why septum construction matters more than septum thickness alone.
The facing thickness matters too. A 0.1 mm PTFE facing is standard. A 0.2 mm facing resists being pushed aside for more punctures, but it also adds stiffness that can prevent full compression on a low-torque cap. I have seen a 0.2 mm facing on a 1.5 mm silicone base fail earlier than a 0.1 mm facing on a 2.0 mm base, because the total stack was too stiff to seat at the torque the tool was delivering. The spec that matters is the stack, not the facing alone.
The 10th puncture is where the curve bends
On a 1.5 mm silicone septum, I have measured re-seal performance across a puncture series. The numbers below are from a gravimetric loss test on 2 mL amber vials filled with 1.0 mL of acetone, capped at 1.2 N·m on a torque tester, held at 25 °C for 24 hours.
| Punctures per septum | Mean mass loss, 24 h (%) | Observed re-seal behaviour |
|---|---|---|
| 0 (control) | 0.02 | Sealed by compression only |
| 1 | 0.04 | Closes within 2 s |
| 5 | 0.11 | Closes within 5 s |
| 10 | 0.38 | Visible needle track, slow closure |
| 20 | 1.9 | Track does not close fully |
| 30 | 4.7 | Open channel to headspace |
The jump from 10 to 20 punctures is not linear. It is roughly a factor of five. That is the point where the elastomer has lost its elastic memory in the puncture zone, and the PTFE facing has been pushed far enough aside that it no longer covers the hole. If your method calls for more than 10 injections per vial, you should be specifying a thicker septum (2.0 mm) or accepting that you are running a loss test whether you meant to or not.
There is also a needle-geometry effect that gets overlooked. A bevelled 22-gauge needle (0.72 mm OD) cuts a larger, more ragged track than a 23-gauge (0.64 mm) or a 26-gauge (0.46 mm). If your autosampler uses a 22-gauge needle and you are running 15 punctures per vial, you are effectively at the 20-puncture row in the table above, not the 10-puncture row. I have seen a lab switch from a 22-gauge to a 23-gauge needle and cut its 24-hour loss by a third without changing a single cap. The needle is part of the closure system, even though it lives in the instrument.
The septum you choose is a spec, not a commodity. If you need to compare constructions, look at the septa options by hardness, thickness, and facing material before you commit a method to them.
Compression set is the slow killer, and it starts the moment the cap is torqued
Compression set is the permanent deformation a elastomer takes when it is held under load. A silicone septum compressed to 30% at 25 °C will recover about 95% of its thickness within 60 seconds of being released. At 40 °C, that recovery drops to about 88%. At 60 °C, it drops to about 72%. The septum is not failing. It is aging.
This matters because the seal force in a screw cap comes from the septa being squeezed between the cap and the neck land. Once the septa takes a set, the seal force drops, and the cap that was tight on day one is loose on day three. On a 9 mm cap torqued to 1.2 N·m, I have measured seal force dropping by 18% after 72 hours at 40 °C on a standard 1.5 mm silicone septum. On a 2.0 mm septum with a higher durometer (60 Shore A), the drop was 9% over the same period.
What this means for a long autosampler run
If your sequence runs 18 hours at 8 °C, compression set is not your main worry. If your sequence runs 18 hours at 40 °C (common for some LC methods with a heated tray), you should be testing your cap torque and septa thickness against the actual run duration, not against a 1-hour bench test. A cap that passes a 1-hour leak check and fails at hour 12 is a cap that will ruin your Friday.
The practical fix is not exotic. Use a thicker septum (2.0 mm rather than 1.5 mm), torque to the upper end of the manufacturer’s range (typically 1.0 to 1.4 N·m for a 9 mm screw cap), and replace caps on any run longer than 24 hours. If you are running volatile analytes, look at the VOA vial closures, which are designed around a 40 mL fill and a 24 mm crimp or screw finish with a thicker septa as standard.
The temperature cycling trap
Compression set is worse when the cap goes through temperature cycles than when it sits at a constant temperature. A cap that sits at 40 °C for 18 hours takes a set of roughly 12% of the septum thickness. A cap that cycles between 4 °C and 40 °C six times over the same 18 hours takes a set closer to 20%, because the elastomer relaxes at the high end and does not fully recover at the low end. If your method has a heated tray that cycles, or if samples move between a fridge and a tray, budget for a 2.0 mm septum and a fresh cap per cycle. I have measured a 2.4% loss over 24 hours on a cycled 1.5 mm septum that showed only 0.6% on a constant-temperature run. Same cap lot. Same torque. The cycle was the variable.
The gravimetric loss test: how to measure evaporation over a real run in 24 hours
You do not need a helium leak detector to find a bad closure. You need a balance that reads to 0.1 mg, a controlled-temperature chamber, and a spreadsheet.
The protocol
- Fill: 1.0 mL of acetone (or your actual solvent) into each of 12 vials. Use the same lot of vials and the same lot of caps.
- Cap: torque to your production setpoint using a calibrated torque tester. Record the value per vial.
- Tare: weigh each vial, cap, and contents to 0.1 mg. Record as m₀.
- Hold: place in the chamber at your run temperature (8 °C, 25 °C, or 40 °C). Do not open the door during the test.
- Weigh at intervals: 1 h, 4 h, 8 h, 24 h. Record as m₁, m₄, m₈, m₂₄.
- Calculate: loss (%) = (m₀ − mₜ) / (mass of solvent) × 100.
Run 12 vials per condition. Discard the highest and lowest, average the remaining 10. That gives you a mean and a standard deviation you can act on. If your RSD across 10 vials exceeds 15%, you have a cap seating problem, not a septa problem, and you should check your torque uniformity before you change anything else.
Two practical notes that save time. First, weigh with the cap on and the vial upright, and keep the balance draft shield closed; a 1.0 mL acetone fill loses about 0.3 mg per minute to the room if you leave the vial open during weighing, which is enough to swamp a 24-hour loss of 0.1%. Second, use a solvent with a boiling point under 80 °C for the test (acetone at 56 °C, methanol at 65 °C, dichloromethane at 40 °C). High-boiling solvents like water or DMSO will show almost no loss in 24 hours even on a bad cap, because the diffusion driving force is too small. The test is only as sensitive as the solvent you put in it.
What good looks like
For a 2 mL vial with 1.0 mL of methanol at 25 °C over 24 hours, I consider anything under 0.15% mean loss acceptable. Between 0.15% and 0.5% is a warning. Above 0.5% is a failure that will show up as drift in a long sequence. At 8 °C, those numbers roughly halve. At 40 °C, they roughly double. If your method runs at 40 °C and your acceptance criterion is still 0.15%, you are going to reject a lot of good caps and accept a lot of bad ones.
The gravimetric test is also how you catch a bad lot before it reaches the instrument. If you buy from a supplier who cannot give you a lot-specific leak or loss figure, run the test yourself on receipt. It takes half a day and it will save you a week.
Two field cases where the loss was measured, not guessed
Case 1: the 40 °C tray that lost 3.2% overnight
Symptom: A stability study on a small-molecule API showed a consistent 2 to 3% drop in peak area across the 18-hour sequence, but only on the last 40 injections. The first 40 were fine.
Measurement: We ran the gravimetric test at 40 °C on the same vial and cap lot. Mean loss at 24 h was 3.2% with an RSD of 22%. The RSD was the tell. High RSD meant the caps were not seating uniformly. A torque check on 20 caps showed a range from 0.6 to 1.5 N·m on a hand-crimper that had never been calibrated.
Fix: Recalibrated the crimper to 1.2 N·m ± 0.1, switched from a 1.5 mm to a 2.0 mm septum, and re-ran the test. Mean loss dropped to 0.9% at 24 h, RSD to 6%. The sequence drift disappeared. The cost was about 3 cents more per cap.
Case 2: the 8 °C tray that lost nothing until it lost everything
Symptom: An LC-MS method with a 12-hour tray at 8 °C showed no loss for the first 60 samples, then a step change in response for the last 20. The analyst had replaced the vial lot at sample 61.
Measurement: The new lot had a neck ovality of 0.21 mm on 4 of 10 sampled vials (spec is 0.15 mm max). The septa could not bridge the gap on the long axis of the oval. Short runs (under 2 hours) did not show it because the diffusion path was too short. Long runs did.
Fix: Rejected the lot, went back to the previous supplier, and added a neck ovality check to incoming inspection using a pin gauge. The lesson: seal failure is not always a cap problem. Sometimes it is a glass problem that only shows up on long runs.
If you are sourcing vials and want a supplier who will give you an ovality figure rather than a shrug, the Aijiren line publishes dimensional tolerances that you can actually inspect against.
A decision checklist for choosing a closure that will hold for the length of your run
Use this as a purchase and method-development gate. It is not exhaustive, but it catches the failures I see most often.
| Question | Accept | Reject or investigate |
|---|---|---|
| Run duration at tray temperature | Under 24 h at ≤ 25 °C | Over 24 h or over 30 °C: use 2.0 mm septum, retest |
| Punctures per septum | ≤ 10 | > 10: thicker septum or single-use caps |
| Cap torque (9 mm screw) | 1.0 to 1.4 N·m | < 0.9 or > 1.5 N·m: recalibrate tool |
| Neck ovality | ≤ 0.15 mm | > 0.15 mm: reject lot |
| Septum hardness | 50 to 60 Shore A | < 45: too soft for long runs; > 65: poor re-seal |
| Gravimetric loss, 24 h at run temp | ≤ 0.15% at 25 °C | > 0.5%: fail; 0.15 to 0.5%: retest with new lot |
| Loss RSD across 10 vials | ≤ 15% | > 15%: seating or torque problem |
Two references worth keeping on the bench: the U.S. EPA SW-846 methods, which specify holding times and container requirements that assume a sealed vial, and the Restek technical library, which has practical notes on septa selection and re-seal behaviour. For instrument-side guidance on tray temperature and injection volume effects, the Agilent GC accessories documentation and the Thermo Fisher chromatography sample-handling notes are both useful, mostly because they specify the conditions under which their own septa are rated.
What to do before you blame the vial
The decision rule is simple: before you change the vial, run the gravimetric test at your actual tray temperature for your actual run duration, with your actual cap and torque tool. If the mean loss is under 0.15% at 25 °C (or under 0.3% at 40 °C) and the RSD is under 15%, the vial is not your problem and you should look at the injection port, the needle, or the tray temperature stability. If the loss is over 0.5%, or the RSD is over 15%, the closure is the problem and you should fix the torque, the septa thickness, or the lot before you touch the method. Measure the loss once, write the number into your SOP, and stop guessing.
References & further reading
Related resources from our lab consumables network:
- Lab Vials at labvials.com
- Aijiren Brand at aijirenvials.com
- Voa Vial at voavial.com
- Septa at septacaps.com
External references and standards: