
I once watched a lab spend three weeks chasing a split peak on an HPLC-UV method before anyone thought to check the vial. The autosampler needle was bottoming out at 0.8 mm above the base, the vial was a 12 x 32 mm with a 15 mm body height and a 4.6 mm ID, and the draw volume was 250 µL. The needle was hitting the shoulder. Once we swapped to a wide-mouth 12 x 32 mm with a 6.0 mm ID and a properly seated 1.0 mm-thick septum, the split disappeared. That is the whole problem with vial selection: the failure is dimensional, but the symptom is chromatographic. If you are buying vials by convenience rather than by matching them to your autosampler or inlet geometry, you are going to spend a lot of time chasing ghosts. This guide is about the numbers that matter when you match vial dimensions to the instrument.
Every autosampler or GC inlet defines a three-dimensional envelope. Your vial, cap, and septum have to fit inside that envelope with enough clearance for the transport mechanism, the needle stroke, and the thermal expansion you get at inlet temperatures. There are five dimensions that actually matter, and I want to name them explicitly because most catalogs bury them.
- Body height. For a standard 12 x 32 mm vial this is typically 32 mm from base to the top of the crimp or screw finish. Some short vials are 28 mm and some tall vials are 40 mm. If your autosampler tray has a fixed gate height, a 40 mm vial will jam it.
- Outer diameter. 12 mm is the near-universal standard for 2 mL autosampler vials. Some instruments (older Waters, some Shimadzu racks) accept 11.6 mm only. A 12.0 mm vial in an 11.6 mm pocket will sit cocked and the needle will miss the center.
- Inner diameter (ID). This is the one people ignore. A standard 12 x 32 mm has an ID of about 4.6 mm; a wide-mouth version has 6.0 mm. The ID controls how low the needle can go before it hits the shoulder, and it controls how much you can draw before you start pulling air.
- Neck finish. Crimp, screw thread (8-425, 9 mm, 10-425, 13-425), or snap. The 9 mm short-thread screw finish is the closest thing the industry has to a standard for 2 mL vials, and it is defined under the GPI 9 mm convention. The 8-425 is the older, taller screw thread you still see on some autosamplers.
- Seal height and septum thickness. A crimp seal adds 3 to 4 mm above the glass rim. A screw cap adds 4 to 5 mm. Septum thickness runs from 0.9 mm (thin, high-puncture-count) to 3.0 mm (thick, low-bleed).
Stack those up and you get a total height of about 36 to 37 mm for a capped 12 x 32 mm vial. If your autosampler specifies a maximum vial-plus-cap height of 36.5 mm, you have 0.5 mm of margin. That is not a lot. I have seen a lab switch from a 1.0 mm to a 1.5 mm septum on a 9 mm screw cap and start jamming the tray because the total stack grew by half a millimeter.
Why the ID is the number that burns you
The inner diameter sets your usable draw volume. For a 12 x 32 mm vial with a 4.6 mm ID, the glass wall is about 1.2 mm thick, and the internal floor-to-shoulder height is roughly 26 mm. That gives a nominal capacity of about 1.5 mL usable, though the vial is sold as “2 mL.” If your autosampler draws 200 µL with the needle at 2 mm above the base, you need a minimum volume of about 400 µL to avoid pulling air, because the liquid surface drops as you draw and the needle has to stay submerged.
Wide-mouth vials (6.0 mm ID) let you draw the same volume from a shallower liquid level and let the needle go lower without hitting glass. For methods that draw 5 to 10 µL from a 100 µL sample, wide-mouth is almost always the right choice. For methods that draw 50 µL from a 1.5 mL sample, the standard 4.6 mm ID is fine and you get better sample recovery because there is less wetted surface area on the shoulder.
Matching to specific autosampler families
Autosamplers fall into a handful of mechanical families, and each one has a dimensional signature. I am not going to pretend I have run every instrument on the market, but the families below cover the majority of installed base in pharma, environmental, and food testing labs.
Agilent 7693A and 7697A (GC liquid and headspace)
The 7693A tray accepts 12 x 32 mm vials with a maximum capped height of about 36 mm. The injector needle stroke is set by the method, and the default needle depth is 5 mm above the vial base. That means the needle tip sits at 5 mm, which is above the 1.5 mL liquid level if you have filled the vial to 1.0 mL. In practice you want a minimum fill of 1.0 mL for a 10 µL injection with a 5 mm needle depth, because the surface drops during the injection sequence. Agilent publishes the exact tray and needle geometry in their chromatography consumables documentation, and it is worth pulling the drawing for your specific tray part number rather than assuming.
The 7697A headspace sampler is a different animal. It uses 20 mL crimp-top vials, typically 23 x 75 mm with a 20 mm crimp finish. The vial sits in a heated oven at up to 200 °C, and the septum has to hold pressure at that temperature. A butyl septum is standard; a silicone-faced PTFE septum will bleed siloxanes at 150 °C and give you a baseline that looks like a mountain range. If you are doing headspace, the vial and septum are a thermal system, not just a container.
Thermo Scientific autosamplers (TriPlus, AI/AS 1310, AS 3000)
Thermo’s autosamplers generally accept 12 x 32 mm vials with a 9 mm screw or crimp finish. The AI/AS 1310 tray has a maximum height of about 36 mm and a maximum diameter of 12.2 mm. The needle guide is tighter than Agilent’s, so a vial that is slightly out of round (more than 0.1 mm runout) will bind. I have had batches of cheap glass where the ID was off-center by 0.3 mm, and the needle would scrape the wall and produce a coring event that showed up as a ghost peak at the retention time of the plasticizer. Thermo’s chromatography and sample handling pages list the tray dimensions by part number; use them.
Waters Alliance and ACQUITY
Waters instruments are the ones that will bite you on diameter. The Alliance 2695 uses a 12 x 32 mm vial, but the carousel pockets are machined for 11.6 mm nominal OD. A 12.0 mm vial will fit, but if the glass is at the top of the tolerance (12.05 mm) it will sit high and the needle will not reach the bottom. The ACQUITY UPLC sample manager uses a 12 x 32 mm vial with a 9 mm screw finish and a maximum capped height of 36.0 mm. That 36.0 mm is tighter than Agilent’s 36 mm. If you are sharing vials between a Waters and an Agilent instrument, buy the shortest cap you can and check the stack with a caliper.
Shimadzu SIL-20A and SIL-30A
Shimadzu trays accept 12 x 32 mm vials, but the SIL-30A has a 1.5 mL vial rack with a maximum height of 35.5 mm. That is the tightest stack I have dealt with in a mainstream HPLC autosampler. A 9 mm screw cap with a 1.5 mm septum will just fit; a 2.0 mm septum will not. If you are running a Shimadzu and buying vials from a distributor who does not publish the capped height, measure a sample before you commit to a case.
GC inlet geometry: where the vial meets the vaporization chamber
In GC, the vial dimensions are only half the story. The inlet liner, the septum purge, and the injection port temperature all interact with the vial cap and septum. A split/splitless inlet at 250 °C will heat the septum to near its service limit, and a silicone septum that is rated to 300 °C will still bleed if the purge flow is too low.
The relevant dimensions here are the septum diameter and the seal geometry. An 11 mm septum fits the standard Agilent and Restek inlet nut; a 9.5 mm septum fits the older Shimadzu and some Thermo inlets. The septum has to compress evenly, which means the cap has to be torqued to a consistent value. For a 9 mm screw cap, I use 0.8 to 1.2 N·m on a torque wrench; below 0.6 N·m you get leaks, above 1.5 N·m you deform the septum and it cores on the first injection. Crimp caps are more forgiving because the crimper sets the compression, but a worn crimper jaw will under-crimp and you will see it as a wandering retention time on early-eluting peaks.
The septum itself is where GC vial selection gets interesting. A silicone septum with a PTFE face is the workhorse: it handles 50 to 100 punctures before coring becomes a problem, and it is rated to about 250 °C continuous. A butyl septum is better for headspace and for trace sulfur work because it has lower oxygen permeability, but it is rated to only about 120 °C. A PTFE-faced silicone with a 1.0 mm thickness is the default for most split/splitless work. If you are running EPA SW-846 methods (and you can check the exact method requirements in the SW-846 compendium), the method often specifies the septum material and the maximum injection port temperature, and it is not negotiable.
I keep a small stock of septa in three materials (silicone/PTFE, butyl, and a high-temperature silicone) and match them to the inlet temperature and the sample matrix. It is cheaper to keep three part numbers than to re-run a batch because the septum bled.
Headspace and purge-and-trap: the 20 mL and 40 mL world
Headspace and purge-and-trap vials are a separate dimensional family. The standard headspace vial is 20 mL, 23 x 75 mm, with a 20 mm crimp finish. The purge-and-trap vial is 40 mL, 28 x 95 mm, with a 24 mm screw or crimp finish. These are not interchangeable with autosampler vials, and the septa are thicker (typically 3.0 mm) because they have to hold pressure at temperature.
The critical dimension for headspace is the crimp height. A 20 mm crimp cap has to be crimped to a specific height (typically 7.5 to 8.0 mm from the vial rim to the top of the cap) to seal properly. An under-crimped cap will leak at 150 °C and you will see it as a low response on the first injection of a sequence. An over-crimped cap will crack the neck. I use a crimper with a depth stop and check the height with a caliper every 50 caps.
For volatile organic analysis (VOA), the vial and the septum are part of the analytical method. A VOA vial with a PTFE-faced silicone septum is standard, and the zero-headspace requirement means the vial has to be filled to the shoulder and capped without bubbles. The VOA vial geometry (40 mL, 24 mm finish, conical interior) is designed for that, and the septum has to be thin enough to pierce cleanly but thick enough to reseal. A 3.0 mm PTFE-faced silicone is the usual choice.
A decision checklist with numbers
Here is the checklist I use when a lab asks me to specify vials for a new instrument. I have put the numbers in because vague advice is useless.
- Measure the tray. Maximum vial OD, maximum capped height, and pocket depth. Write them down. Do not trust the catalog.
- Measure a vial. Use a caliper on 10 vials from the case. Record OD, body height, ID, and capped height. If the standard deviation on OD is more than 0.05 mm, reject the lot.
- Calculate the minimum fill volume. Take the draw volume, add the needle dead volume (typically 10 to 20 µL), and add a safety margin of 50%. For a 100 µL draw, that is 150 to 180 µL minimum, but I would not go below 250 µL in a 4.6 mm ID vial because the surface drop is steeper.
- Check the needle depth. If the method draws from 2 mm above the base, the vial ID has to be wide enough that the needle does not hit the shoulder. For a 12 x 32 mm with a 4.6 mm ID, the shoulder starts at about 26 mm from the base. A 2 mm needle depth is fine; a 1 mm depth is not.
- Match the septum to the temperature. Inlet at 250 °C: silicone/PTFE, 1.0 mm. Headspace at 150 °C: butyl, 3.0 mm. Purge-and-trap at ambient: PTFE-faced silicone, 3.0 mm.
- Torque the caps. 9 mm screw caps at 0.8 to 1.2 N·m. 8-425 caps at 0.6 to 1.0 N·m. Crimp caps at a crimper setting that gives a 7.5 to 8.0 mm crimp height for 20 mm caps.
- Run a puncture test. Take 20 vials, inject 20 times each, and check for coring on the 20th injection. A good septum should show no visible coring at 50 punctures and only minor deformation at 100.
Troubleshooting checklist: symptoms and the dimensions behind them
When a method goes sideways, the vial is usually the last thing anyone checks. Here is how I map symptoms to dimensions.
- Split or double peak on early-eluting compounds. Usually a coring event. Check septum puncture count and cap torque. If the septum has more than 50 punctures, replace it. If the cap is under-torqued, the septum can lift and core.
- Wandering retention time on the first injection of a sequence. Under-crimped cap or a leaking septum. Check crimp height and torque. A leak of 1 µL/min at the inlet will shift retention time by 0.05 to 0.1 min on a 30 m column.
- Low response on the first injection, normal on the second. The septum is equilibrating. This is common with a new butyl septum at 150 °C; it needs two or three blank injections to stabilize.
- Needle jam or “vial not found” error. OD out of tolerance or capped height over the tray maximum. Measure 10 vials and check the mean and standard deviation.
- Ghost peak at a fixed retention time. Plasticizer from a coring event or siloxane from a silicone septum at high temperature. Run a blank with a new septum and compare.
- Incomplete transfer of a small volume. Needle depth too shallow or ID too narrow. Switch to a wide-mouth vial (6.0 mm ID) and lower the needle depth by 1 mm.
I keep a Restek technical resource page bookmarked for the inlet and septum geometry tables, and I cross-check against the instrument vendor’s drawings. The two do not always agree, and when they disagree the instrument drawing wins.
Glass, plastic, and the material question
Most of this article assumes borosilicate glass, which is the right default for HPLC and GC. Glass is inert, has a low coefficient of expansion (about 3.3 x 10⁻⁶ /°C for borosilicate 3.3), and does not leach plasticizers. But there are cases where plastic is the right answer.
Polypropylene vials are fine for ICP-MS and for ion chromatography, where you are worried about sodium and boron leaching from glass. They are not fine for HPLC with UV detection at 210 nm, because polypropylene has UV absorbance and you will see a rising baseline. Polycarbonate is not appropriate for autosampler vials at all; it crazes with common solvents.
For trace metals work, I use PFA or polypropylene vials with a PTFE septum, and I acid-leach them before use. For PFAS work, the vial and septum have to be PFAS-free, which rules out most PTFE-faced septa. That is a separate problem, and it is why some labs are moving to polypropylene vials with a silicone septum for PFAS methods.
If you are buying glass, ask for the USP Type I borosilicate specification and the ISO 4796 dimensional standard. A vial that meets both will have a consistent ID and a flat bottom, which matters for needle depth repeatability. The lab vials catalog at labvials.com lists the dimensional tolerances by part number, and I would not buy a case without seeing those numbers.
What I recommend, with specific parameters
For a typical HPLC-UV or LC-MS lab running 12 x 32 mm vials, here is the configuration I would buy and the numbers I would hold the supplier to.
- Vial: 12 x 32 mm, borosilicate 3.3, wide-mouth (6.0 mm ID), 1.5 mL usable volume, OD tolerance ±0.05 mm, body height 32.0 ±0.2 mm.
- Cap: 9 mm short-thread screw, polypropylene, with a 1.0 mm silicone/PTFE septum. Capped height 36.0 ±0.3 mm. Torque 1.0 N·m.
- Septum: silicone with a PTFE face, 1.0 mm thick, rated to 250 °C, 50 to 100 punctures before replacement.
- Fill volume: minimum 250 µL for a 100 µL draw; 1.0 mL for a 10 µL draw with a 5 mm needle depth.
For GC split/splitless, the same vial body works, but I would specify a crimp cap with an 11 mm septum if the inlet is at 250 °C or above. Crimp caps hold torque better than screw caps at temperature, and the crimper sets the compression consistently. For headspace, go to the 20 mL, 23 x 75 mm vial with a 20 mm crimp and a 3.0 mm butyl septum, crimped to 7.5 to 8.0 mm.
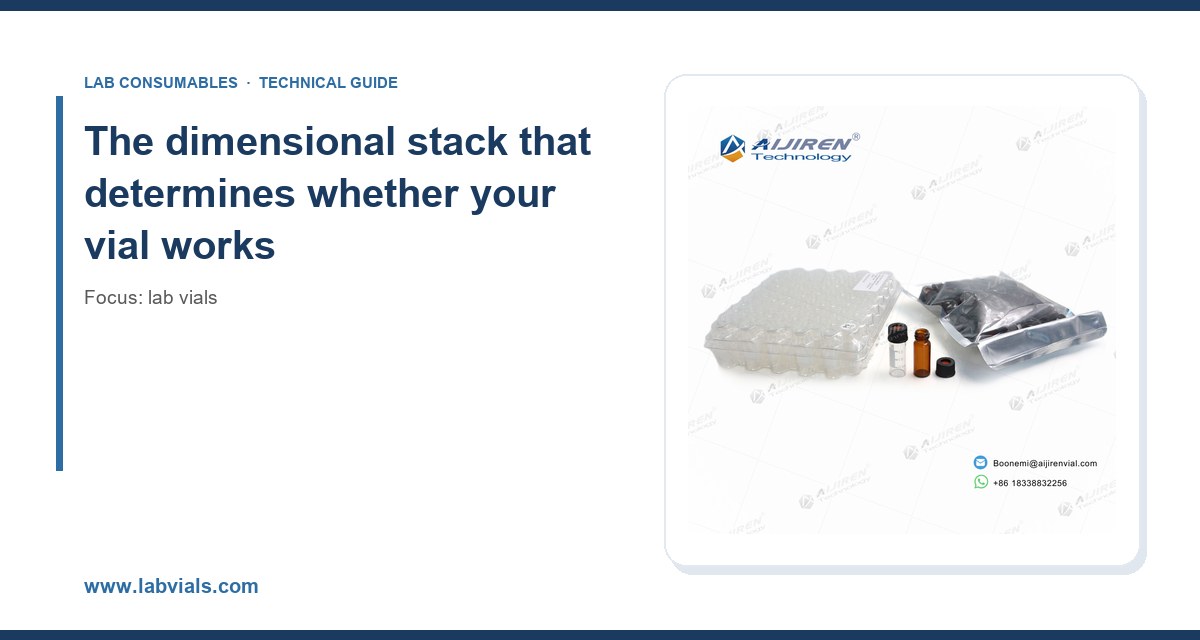
If you are sourcing across brands, the Aijiren line is worth a look because they publish the dimensional tolerances and the septum materials in the same document, which is more than most distributors do. I have used their 9 mm screw caps on Agilent and Shimadzu instruments without a jam, but I still measure the first case before I commit a method to them.
The takeaway
Matching lab vials to your autosampler or inlet is a dimensional problem, not a brand problem. Measure the tray, measure the vial, and hold the supplier to the numbers: 12 x 32 mm body, 32.0 ±0.2 mm height, ±0.05 mm OD tolerance, 36.0 ±0.3 mm capped height, 1.0 N·m torque on 9 mm screw caps, and a septum rated for the inlet temperature. If a vial does not fit those numbers, it does not matter how clean the glass is or how good the price is. The chromatogram will tell you, eventually, and it will not be subtle.
References & further reading
Related resources from our lab consumables network:
- Lab Vials at labvials.com
- Aijiren Brand at aijirenvials.com
- Voa Vial at voavial.com
- Septa at septacaps.com
External references and standards: