
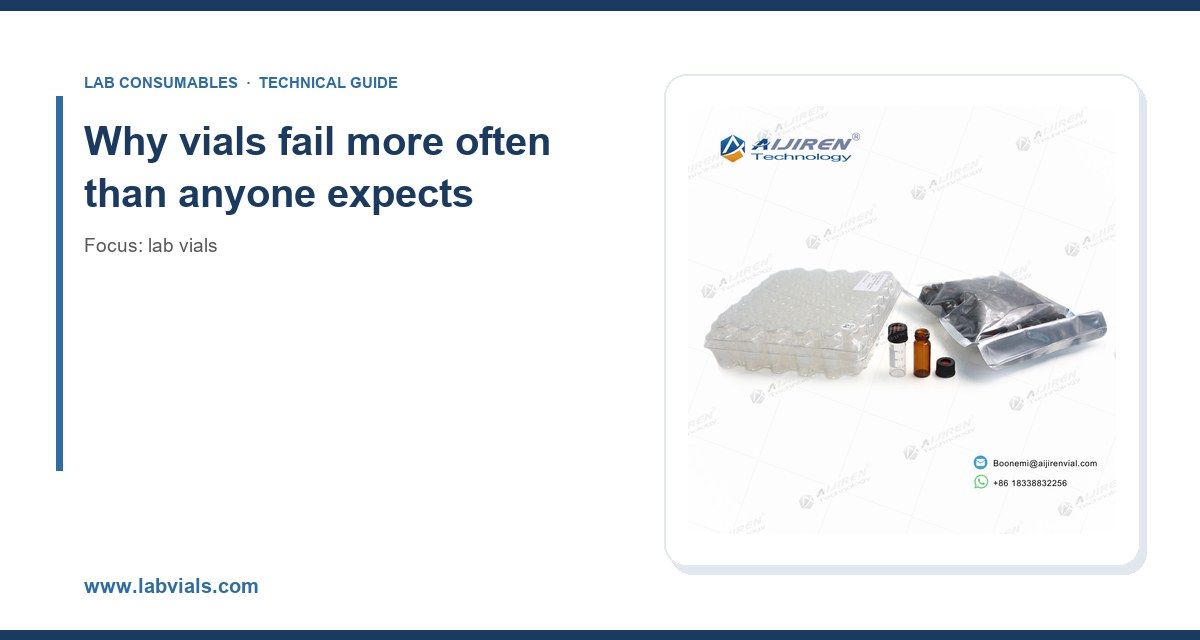
I still remember the Monday morning when an autosampler tray came back with twenty-three vials sitting in pools of their own solvent. The caps were on. The septa were intact. The samples were gone. That was the day I stopped treating vials as a commodity line item and started treating them as a critical part of the analytical chain. Over the years since, I have catalogued the ways vials fail in daily use, and almost none of those failures are random. They come from a small set of root causes that repeat across every lab I have walked through.
This article is a field guide to those failures. It covers what actually goes wrong with vials, why it goes wrong, and the specific steps that prevent it. If you run a QC bench, an environmental lab, or a method development group, you will recognize most of these. The numbers and standards here are the ones I use when I audit a consumables program.
A vial is a simple object. A glass or plastic body, a neck with a specific thread or crimp geometry, a closure, and a septum. The failure modes are equally simple in principle: the seal leaks, the glass breaks, the sample adsorbs to a surface, the septum degrades, or the autosampler cannot pick up the vial. The complication is that these failures are usually silent. A leaking vial does not throw an error code. It just evaporates your sample overnight and hands you a result that looks plausible but is wrong.
I have seen labs chase a “bad column” for two weeks when the real problem was a batch of vials with an out-of-tolerance neck finish. I have seen a method fail acceptance criteria because a septum was leaching plasticizer into a low-level VOC run. Neither showed up as a vial problem on the first pass. That is the nature of B-category troubleshooting: the symptom appears somewhere else in the workflow.
Good vial management starts with buying from a supplier who can give you dimensional data and material certifications, not just a catalog photo. If you are sourcing broadly, the reference range at Lab Vials at labvials.com is a reasonable starting point for matching formats to instruments, and the Aijiren brand at aijirenvials.com line is one I have used where dimensional consistency mattered for high-throughput autosamplers.
Failure mode 1: evaporation and sample loss through a bad seal
Evaporation is the most common and most underdiagnosed vial failure. A 2 mL vial with a loosely seated septum can lose a meaningful fraction of a volatile solvent in 24 to 48 hours on a tray. For a method that runs overnight, that is a concentration change you will never see in the data unless you run a check standard.
Root causes
- Wrong cap torque on screw-thread vials. Under-tightening leaves a gap at the septum. Over-tightening deforms the septum and can crack the neck. For most 9 mm short-thread screw caps, the practical target is hand-tight plus a quarter turn, roughly 0.5 to 0.8 N·m on a torque tester. Crimp vials are a different animal entirely.
- Mismatched cap and vial thread. A 9 mm screw cap on a vial molded to a slightly different thread pitch will seat crooked. The septum looks flat but the seal is a line contact, not a face contact.
- Septum hardness out of spec. A septum that is too soft (below about 45 Shore A) extrudes into the vial under compression. Too hard (above about 60 Shore A) and it will not conform to the neck seat.
- Reused caps. Screw caps are single-use. The thread deforms on first seating and never recovers the same seal.
Prevention
Buy caps and vials as a matched system from one supplier, and verify the neck finish against the dimensional drawing. For critical volatile work, run an evaporation study once per lot: fill ten vials with your actual solvent, cap them to your standard procedure, weigh them at t=0 and t=24 h, and calculate percent loss. Anything above 0.5% mass loss in 24 hours at room temperature tells you the closure system is not holding, and you should look at the septum durometer and the cap torque before you look anywhere else.
If you are running headspace or purge-and-trap work, the closure is doing double duty: it has to hold pressure at temperature. That is where the VOA vial at voavial.com format matters, because a true volatile organic analysis vial is specified for the pressure and temperature of the method, not just the volume.
Failure mode 2: septum coring and needle damage
Every injection punches a hole in the septum. After enough punches, the hole does not close, and you get a leak, a coring particle in the sample, or a bent needle. The puncture life of a septum is a real number you can specify, and most labs never ask for it.
What the numbers look like
A standard silicone/PTFE septum in a 9 mm screw cap is good for roughly 50 to 100 punctures with a 23-gauge needle before leakage becomes measurable. A pre-slit septum can push that to 150 or more, at the cost of slightly higher background for volatile analytes. A PTFE-faced silicone septum is the default for HPLC and GC because the PTFE face is chemically inert and the silicone provides the reseal. For high-throughput autosamplers running 96-well plates or long sequences, pre-slit septa are usually the right call. For single-injection stability studies, a solid septum gives you a cleaner background.
Root causes of coring
- Needle gauge too large for the septum. A 21-gauge needle in a thin septum cores it fast. Match needle gauge to septum thickness.
- Needle off-center. An autosampler that is not aligned to the vial center punches the same off-axis spot every time and tears the septum rather than piercing it.
- Septum thickness below spec. A septum under about 1.0 mm thick has too little material to reseal reliably.
- Repeated re-injection through the same cap. If your sequence reinjects from the same vial, rotate caps or use pre-slit septa.
I keep a simple rule for autosampler alignment: run a dye test. Fill a vial with a water-soluble dye, let the autosampler do ten injections, then look at the septum under a loupe. If the puncture marks are not clustered in the center third, realign the needle guide. It takes ten minutes and saves a month of mysterious coring complaints. The septa at septacaps.com catalog lists durometer and thickness for each format, which is the data you need to set a puncture-life spec.
Failure mode 3: adsorption and analyte loss on glass and plastic
Some analytes stick to the vial wall. This is not folklore; it is measurable, and it is worst for hydrophobic compounds, proteins, and anything at low concentration. A basic drug at 1 ng/mL in a glass vial can lose 20 to 40 percent of its signal to the wall in a few hours. The same compound in a properly deactivated vial loses almost nothing.
Root causes
- Untreated borosilicate glass. The silanol groups on the surface are the adsorption sites. Standard Type I glass is fine for most inorganic work and terrible for trace organics.
- Wrong plastic. Polypropylene is the default for plastic vials and is generally low-adsorption, but it is not inert to all solvents. Polystyrene is worse for many analytes and should not be used with strong solvents.
- pH effects. Adsorption climbs sharply at pH values where the analyte is neutral and hydrophobic. A method buffered to the wrong pH will lose analyte to the wall no matter what vial you use.
- No silanization or deactivation. A deactivated glass vial has its surface silanols capped, which cuts adsorption dramatically for basic compounds.
Prevention
For trace organic work, specify deactivated glass or low-adsorption polypropylene. Run a wall-adsorption check as part of method validation: prepare the same standard in three vial types, hold at your autosampler temperature for the length of your run, and compare peak areas. A difference above 5% RSD between vial types means the vial is part of your method and must be controlled as a reagent. This is one of the checks I insist on before a method goes live, because it is cheap and it catches a class of failure that is otherwise invisible.
The chromatography suppliers publish a lot of useful background on sample handling effects. Agilent chromatography consumables and columns and Thermo Fisher chromatography and sample handling both have application notes on vial and septum effects that are worth reading before you blame the column.
Failure mode 4: chemical attack on the septum and cap
Not every septum is compatible with every solvent. A silicone septum swells in toluene and hexane. A butyl septum is fine for many aqueous systems but degrades in ketones. The failure shows up as a swollen septum that no longer seals, a cap that pops off under pressure, or extractables that show up as ghost peaks in the chromatogram.
Compatibility quick reference
- Silicone/PTFE: the general-purpose choice for HPLC and GC. Good for aqueous, alcohols, and most common solvents. Not ideal for prolonged contact with nonpolar hydrocarbons.
- Butyl/rubber: good for aqueous and many polar solvents, poorer for ketones and chlorinated solvents.
- PTFE-faced: the PTFE face gives chemical inertness to the sample side; the elastomer behind it provides the seal.
- Polypropylene caps: compatible with most HPLC solvents but not with strong oxidizers or some chlorinated solvents at elevated temperature.
If you are running a method under U.S. EPA SW-846 test methods, the method specifies the container and preservation requirements, and those are not suggestions. A method that calls for a specific septum material is telling you what the validation was built on. Deviating from it is a data-integrity risk, not a cost-saving.
Failure mode 5: glass breakage and stress cracks
Breakage is the failure everyone notices, but the root causes are often upstream of the break. A vial that cracks in the autosampler tray usually had a stress point from manufacturing, a thermal shock, or a mechanical overload from a cap that was forced onto a mismatched thread.
Root causes
- Thermal shock. Moving a vial from a freezer at -20 °C directly to a 90 °C water bath will crack borosilicate if the wall is thin or has a flaw. Borosilicate handles the temperature range, but not an instantaneous gradient across the wall.
- Over-torqued caps. A cap forced past the thread stop puts hoop stress on the neck. Combined with a warm autosampler tray, that is where neck cracks start.
- Autosampler gripper force. Some grippers clamp harder than the glass can take, especially on 12 x 32 mm vials with thin walls.
- Manufacturing flaws. A bubble or a cold seam in the glass is a latent failure. This is why dimensional and visual inspection of incoming lots matters.
Prevention is mostly about handling discipline and incoming inspection. Check a sample of every lot for neck cracks under a loupe and for dimensional consistency with calipers. If you are doing cryogenic work, use vials rated for the low end of your range and thaw in stages, not directly on a hot plate.
Failure mode 6: autosampler incompatibility
This is the failure that stops a run cold. The vial is fine, the cap is fine, but the autosampler cannot pick it up, or it picks up two, or the needle bottoms out. The root cause is almost always a dimensional mismatch between the vial and the instrument’s tray and gripper specification.
What to check
- Vial height and diameter. A 12 x 32 mm vial is the standard HPLC format, but a 32 mm height with a slightly different neck length can sit too high in the tray.
- Cap height. A tall cap on a short vial can exceed the gripper clearance. Measure the assembled height, not the vial height.
- Septum thickness. A thick septum raises the assembled height and can cause the needle to bottom out short of the sample.
- GPI/thread standard. The Glass Packaging Institute thread standards define the neck finish. A cap built to a different finish will not seat correctly even if it threads on.
The practical fix is to buy the vial and cap as a matched pair and to verify the assembled dimensions against the autosampler manual before the first run. A quick caliper check on ten assembled vials takes five minutes and prevents the tray full of empties I described at the start.
Failure mode 7: contamination and carryover
A vial that was not cleaned properly, or a cap that shed particles, will contaminate a run. The most common sources are residual manufacturing oils on glass, cardboard or paper dust from packaging, and particles from a cored septum. For trace analysis, a single particle can dominate a chromatogram.
Prevention: buy vials that are certified for the contamination level your method requires, and do not assume “clean” means “certified.” For ultra-trace work, specify vials that have been pre-cleaned and packaged in a controlled environment. Rinse glass vials with the same solvent you will use in the method before use if the certificate does not cover your analyte class. And keep caps in their original packaging until the moment of use; an open bag of caps on a bench is a dust collector.
Troubleshooting checklist
When a vial-related problem shows up, work through this list in order. It is organized by symptom, which is how problems actually arrive at the bench.
Symptom: low or drifting response
- Run an evaporation check: weigh ten vials at t=0 and t=24 h. Target under 0.5% mass loss.
- Verify cap torque on a sample of vials. Target 0.5 to 0.8 N·m for 9 mm screw caps.
- Check septum durometer against the supplier spec (45 to 60 Shore A typical).
- Run a wall-adsorption check across vial types. Flag differences above 5% RSD.
Symptom: ghost peaks or unexpected extractables
- Run a solvent blank in the suspect vial lot and compare to a known-good lot.
- Check septum material compatibility with your solvent list.
- Look for cored particles under a loupe.
Symptom: autosampler errors or bent needles
- Measure assembled vial height with calipers against the instrument spec.
- Run a dye test to check needle alignment.
- Confirm the cap thread finish matches the vial (GPI standard).
Symptom: broken vials in the tray
- Inspect incoming lots for neck cracks and dimensional flaws.
- Review cap torque procedure and autosampler gripper force.
- Check thermal handling: no direct freezer-to-hot-bath transfers.
Comparison: choosing a vial and closure system
Here is the decision table I use when specifying a vial for a new method. The numbers are the ones that matter at the bench.
- Routine HPLC, aqueous and alcohol solvents: 2 mL clear glass, 12 x 32 mm, 9 mm screw thread, silicone/PTFE septum, 50 to 100 punctures, hand-tight plus quarter turn. Lowest cost, adequate for most work.
- Trace organics, basic compounds: deactivated glass or low-adsorption polypropylene, same format, PTFE-faced septum, verify adsorption under 5% RSD.
- High-throughput sequences: pre-slit septum, 150+ punctures, matched cap and vial from one lot, assembled height verified against the autosampler spec.
- Volatile and headspace work: VOA-format vial rated for method pressure and temperature, crimp or screw closure per method, septum material matched to the SW-846 preservation requirement.
- Cold storage and freeze-thaw: borosilicate rated for the low end of the range, staged thaw, no direct thermal shock.
For a deeper technical reference on how these choices interact with the separation itself, the Restek technical resources for chromatography cover sample preparation and consumable effects in useful detail.
Prevention program: what to put in place this quarter
The failures above are mostly preventable with a small set of controls. I recommend four, in this order.
1. Matched-lot purchasing. Buy vials and caps from the same supplier and, where possible, the same manufacturing lot for a given method. Dimensional consistency is the single biggest lever.
2. Incoming inspection. Caliper ten vials per lot for height, diameter, and neck finish. Loupe-inspect for cracks and bubbles. Reject lots that are out of tolerance before they reach the bench.
3. Method-specific validation checks. Run an evaporation check, a wall-adsorption check, and a puncture-life check as part of method validation. Document the vial type as part of the method, not as a purchasing detail.
4. Handling discipline. Single-use caps, torque procedure posted at the bench, no freezer-to-hot-bath transfers, caps kept sealed until use. These cost nothing and prevent most of the failures I have described.
The takeaway is that a vial is a controlled component of the analytical method, with dimensional, material, and closure specifications that determine whether the data is valid. Specify it like a column, inspect it like a reagent, and handle it like a standard. The failures in this article are the ones that cost the most bench time, and every one of them traces back to a specification that was never written down or a handling step that was skipped.
References & further reading
Related resources from our lab consumables network:
- Lab Vials at labvials.com
- Aijiren Brand at aijirenvials.com
- Voa Vial at voavial.com
- Septa at septacaps.com
External references and standards: