
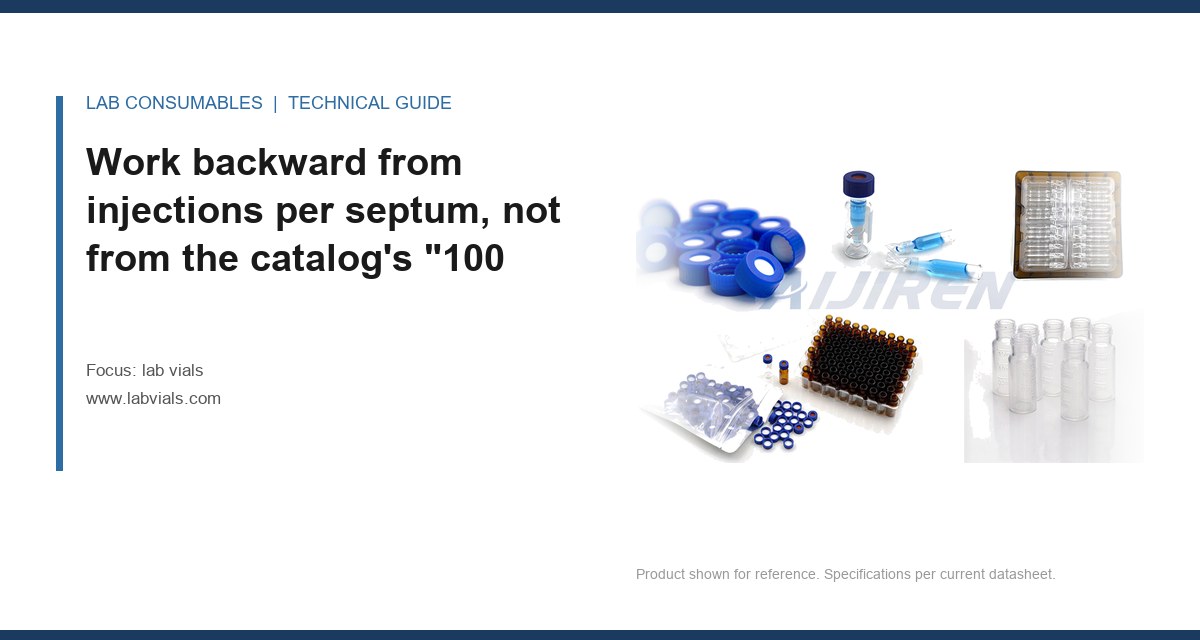
A 9 mm autosampler vial rated for 100 punctures failed at 62 on an Agilent 7693A tower running 96 injections a day, and the lab only found out because the internal standard area count dropped 11% across a single tray. The septum had been pierced clean through in one sector. Nobody had done the arithmetic: 96 injections a day across a 100-puncture septum is a one-day consumable, not a weekly one. That arithmetic, and the fill volume that has to sit behind it, is what this guide is about. Sizing lab vials for real sample volume and injection count is a capacity problem first and a materials problem a distant second.
Work backward from injections per septum, not from the catalog’s “100 punctures”
The puncture rating on a septum datasheet is a starting number, not a service life. It is measured on a fresh needle, at one station, at ambient temperature, usually with a 23-gauge needle and a defined penetration depth. Your tower does none of those things cleanly. Every one of these factors cuts the number:
- Needle gauge. A 26-gauge needle (0.26 mm OD) leaves a smaller hole than a 22-gauge (0.72 mm OD), and the smaller hole reseals better. Going from 22 to 26 gauge can roughly double usable punctures on the same 9 mm septum, but the trade is a slower draw and more shear on fragile samples.
- Penetration depth. A needle that stops 2 mm above the vial floor punches the same septum zone every time. A needle set to bottom-of-vial travel distributes the damage over a slightly larger cone.
- Temperature. A tray held at 10 °C in the autosampler stack stiffens the silicone and reduces reseal. At 4 °C the same septum loses maybe 30% of its rated punctures.
- Needle condition. A burred or bent needle tears rather than pierces. One bad needle can core a septum in twenty injections.
- Solvent in the headspace. Vapors soften the septum face and accelerate creep at the puncture site.
So the working rule I use is rated punctures × 0.6 as a planning number for a clean, room-temperature, 23-gauge setup, and × 0.4 if any of the above is true. A 100-puncture septum becomes a 40-puncture septum in a cold room with a 22-gauge needle. That is the number you size against.
The injection-count arithmetic
Take your run sheet and compute punctures per vial per day:
Punctures per vial per day = (injections per sample) × (replicates per tray) + (blank and QC draws)
A typical sequence: one sample, one duplicate, one matrix blank, one continuing calibration verification every ten samples. If a vial is drawn once for sample and once for duplicate, that is 2 punctures. If the autosampler also draws a wash from the same vial, add one. The vial sits in the tray for the whole run, so the septum sees all of them. At 96 injections a day with 2 draws per vial, a 100-puncture septum (planning 60) is a one-shift consumable. At 40 punctures planning, it is less than half a shift.
This is where most labs get the sizing wrong. They buy a 2 mL vial with a 9 mm septum because it is the default, then run 400 injections a day through it and wonder why the RSD on the internal standard wanders. The fix is either a thicker septum (a 10 mm or 11 mm closure with a bonded PTFE/silicone layer), a shorter run, or a mid-run septum swap. The arithmetic tells you which.
Fill volume is a range, not a number: the 40% to 80% band
The usable fill volume of a vial is bounded below by the needle’s reach and above by the headspace the autosampler needs. For a standard 2 mL (12 × 32 mm) vial, the nominal capacity is 2 mL but the practical working range is 0.8 mL to 1.5 mL. Below 0.8 mL, a needle set to a fixed depth may not reach the liquid, and the autosampler draws air. Above 1.5 mL, you risk the septum being wetted by the sample during transport, and you lose the headspace cushion that keeps the vial from pressurizing.
Those numbers are not arbitrary. They come from the geometry: a 12 mm OD vial with a 1 mm wall has an internal diameter near 10 mm. A 1.5 mL fill sits about 19 mm up the 32 mm body, leaving 13 mm of headspace under a 9 mm septum. That headspace is what absorbs the pressure pulse when the needle enters and the vial is vented. Fill to 1.8 mL and you have 4 mm of headspace; the septum bulges, the needle wets, and you get carryover.
Matching fill to injection volume
The fill volume has to cover the total volume you will draw across all injections from that vial, plus a dead volume you cannot recover. For a 1 µL injection on a split/splitless inlet, the syringe draws 1 µL plus a small overdraw, maybe 1.5 µL total. Ten injections from one vial is 15 µL. That is trivial against a 1 mL fill. The constraint is not the draw volume; it is the needle depth and the dead volume at the bottom.
Dead volume at the vial floor is where the arithmetic gets real. A 2 mL vial with a flat bottom holds roughly 50 to 100 µL below the needle’s lowest reliable reach. A conical (V-bottom) insert drops that to 10 to 20 µL. If your method draws the last 100 µL from a flat-bottom vial, you are drawing air and your peak areas fall off a cliff at the end of the run. I have seen exactly this: a lab running 200 µL of sample in a 2 mL flat-bottom vial, needle depth set to 3 mm above the floor, and the last three injections of every tray showed a 15% area drop. The measurement was the area trend across the tray. The fix was a 300 µL conical insert, which moved the needle’s reachable liquid down to within 2 mm of the tip.
Needle gauge changes both the puncture budget and the sample you can actually draw
Needle gauge is the variable most labs ignore because it is set by the syringe, not the vial. But it drives the puncture-life arithmetic directly. The table below is what I use to convert a septum rating into a realistic service life. It assumes a 9 mm silicone/PTFE septum, ambient temperature, and a clean needle.
| Needle gauge | Nominal OD (mm) | Relative puncture life vs. 23G | Realistic punctures on a 100-rated septum (×0.6 planning) | Draw speed note |
|---|---|---|---|---|
| 22G | 0.72 | 0.8× | ~48 | Fast; good for viscous samples |
| 23G | 0.64 | 1.0× | ~60 | Standard autosampler |
| 25G | 0.51 | 1.3× | ~78 | Slower; watch for septum coring on burred tips |
| 26G | 0.46 | 1.6× | ~96 | Slowest; fine for low-volume draws |
Two things to note. First, the planning multiplier of 0.6 already bakes in a margin; the table shows the raw relative life so you can see the gauge effect on its own. Second, a finer needle is not free. A 26-gauge needle drawing a viscous sample at 5 µL/s will cavitate and pull air. If your sample is a derivatized extract or a high-solids matrix, stay at 23G and accept a shorter septum life, or move to a thicker closure.
Septum thickness and the closure stack
A 9 mm closure typically carries a 1.0 mm silicone/PTFE septum. A 10 mm or 11 mm closure can carry a 1.5 mm or 2.0 mm septum, which roughly doubles the puncture budget for the same needle. The trade is a wider vial neck and a different crimp or screw dimension. If you are on a screw-thread vial, the GPI thread finish (GPI 9-425, GPI 10-425, GPI 13-425) fixes the closure diameter, so you cannot just swap in a thicker septum without changing the vial. Check the thread finish on your current vial before you specify a thicker septum; the lab vials dimension chart is the place to confirm the GPI code against the neck OD.
Dead volume and the conical insert decision
Dead volume is the liquid the needle cannot reach. On a flat-bottom 2 mL vial it is 50 to 100 µL. On a 300 µL conical insert it is 10 to 20 µL. On a 150 µL insert it is 5 to 10 µL. The decision rule is simple: if your total draw per vial is less than five times the dead volume, you need an insert. A 200 µL draw from a flat-bottom vial with 100 µL dead volume is a 50% loss at the end of the run. A 200 µL draw from a conical insert with 15 µL dead volume is a 7% loss.
The insert also changes the puncture arithmetic, because the needle now travels deeper and the septum is often a different, thinner type on the insert cap. I have seen labs add a conical insert to solve a dead-volume problem and then discover the insert’s septum is rated for 50 punctures, not 100. Size both at once.
Field case: the 96-injection tray that drifted
Symptom: internal standard area count fell 11% across a single 96-injection tray, then recovered on the next tray. Measurement: the area trend plotted against injection number, plus a visual inspection of the septum under a loupe. The septum showed a single elongated tear in one sector, not distributed punctures. The needle was a 22-gauge with a slight burr, and the autosampler was set to draw from the same vial position for every injection. Fix: replaced the needle (23-gauge, new), moved to a 10 mm closure with a 1.5 mm septum, and split the tray into two vials per sample. The area trend flattened to under 2% RSD across the tray. The arithmetic that would have caught it: 96 injections, 2 draws per vial, 100-rated septum × 0.6 = 60 punctures planning, so the vial was a one-tray consumable from day one.
Temperature, headspace, and the pressure that eats your septum
A sealed vial is a pressure vessel. Heat it and the headspace expands; cool it and it contracts. A 2 mL vial with 1 mL fill and 1 mL headspace, taken from 4 °C to 25 °C, sees roughly a 7% headspace volume change. That is small, but it is enough to push liquid against the septum if the fill is high. The practical rule: keep the fill at or below 75% of nominal capacity if the vial will be transported or temperature-cycled. That is 1.5 mL in a 2 mL vial, which matches the band above.
The septum material matters here, but not in the way most people think. The PTFE face is inert; the silicone layer behind it does the resealing. A septum that has been compressed and decompressed repeatedly at 4 °C will creep and lose reseal force. If you are running a chilled autosampler stack, plan on 0.4× the rated punctures, not 0.6×. The septa selection charts list the temperature range for each construction; check it against your stack temperature, not your lab temperature.
Field case: the headspace that vented through the septum
Symptom: a set of volatile organic analysis vials showed low recovery on the lighter analytes (dichloromethane, MTBE) after a week in the autosampler tray at 4 °C. Measurement: the recovery trend by analyte boiling point, plus a weight-loss check on a sealed blank. The blanks lost 0.3% mass over seven days. The cause was a 1.8 mL fill in a 2 mL vial, leaving 4 mm of headspace and a wetted septum. The fix was a 1.2 mL fill in a 2 mL vial (60% capacity) and a move to a VOA vial with a thicker septum for the volatile panel. Recovery came back to within 5% of the initial calibration. The arithmetic: 60% fill leaves 40% headspace, which is the cushion that keeps the septum dry.
A sizing checklist you can run against a real run sheet
Work through this in order. Each line has a number you can check against your method.
- Nominal capacity: 2 mL for a 12 × 32 mm vial; 1.5 mL for a 11.6 × 32 mm; 4 mL for a 15 × 45 mm. Confirm the OD and height against the autosampler’s tray spec.
- Working fill: 40% to 80% of nominal. Below 40%, the needle may not reach; above 80%, the septum wets on transport. Target 60% for temperature-cycled vials.
- Dead volume: flat bottom 50 to 100 µL; conical insert 10 to 20 µL; 150 µL insert 5 to 10 µL. If total draw per vial is under 5× dead volume, use an insert.
- Punctures per vial per day: count every draw, including blanks, QC, and wash. Do not forget the duplicate.
- Puncture planning number: rated × 0.6 at ambient, × 0.4 if chilled or using a 22G needle.
- Needle gauge: 23G standard; 25/26G to extend septum life on low-volume draws; 22G only for viscous samples.
- Septum thickness: 1.0 mm standard; 1.5 to 2.0 mm if puncture count per shift exceeds 60.
- Thread finish: confirm GPI code (9-425, 10-425, 13-425) before swapping closures. A thicker septum needs a wider neck.
- Temperature range: check septum rating against autosampler stack temperature, not room temperature.
- Torque: screw-thread closures at 8 to 12 in-oz (0.06 to 0.08 N·m). Over-torque deforms the septum and cuts reseal life.
What to specify, and what to stop buying
Here is the recommendation I give to labs running high-throughput autosamplers. For a 96-injection tray with 2 draws per vial, specify a 2 mL (12 × 32 mm) vial, GPI 9-425 screw thread, 1.5 mm silicone/PTFE septum, 23-gauge needle, 1.2 mL fill. That combination gives you roughly 90 planning punctures, a 40% headspace cushion, and dead volume under 20 µL if you add a conical insert. It is a one-tray consumable by design, so buy it in tray-sized cases and swap every tray.
Stop buying the 100-puncture flat-bottom vial with a 1.0 mm septum for high-throughput work. It is the right part for a 20-injection sequence and the wrong part for a 400-injection day. The Aijiren line carries the 1.5 mm septum closures in the GPI 9-425 format, and the dimensional tolerances on the neck OD are tight enough that the autosampler gripper does not slip. If you are on a GC platform, cross-check the tray spec against the Agilent GC accessories documentation; if you are on LC, the Thermo Fisher sample handling guides list the needle depth defaults that drive your dead-volume number. For method-specific container requirements, the EPA SW-846 methods define the fill and headspace for volatile work, and the Restek technical notes have the puncture-life data behind the gauge table above.
The decision rule is this: compute punctures per vial per day, multiply the septum rating by 0.6 (or 0.4 if chilled), and if the result is less than one day’s draws, the vial is a shift consumable and you should size for a thicker septum or a shorter tray. Fill volume follows from the same arithmetic: 40% to 80% of nominal, 60% for anything that moves or changes temperature, and an insert whenever the total draw is under five times the dead volume. Do that and the septum stops being the variable you blame when the internal standard drifts.
References & further reading
Related resources from our lab consumables network:
- Lab Vials at labvials.com
- Aijiren Brand at aijirenvials.com
- Voa Vial at voavial.com
- Septa at septacaps.com
External references and standards: